How to make a basic starry night effect with splatter paint (on eldar guardians)

The squad post splatter paint
Close up #1
Close up #2

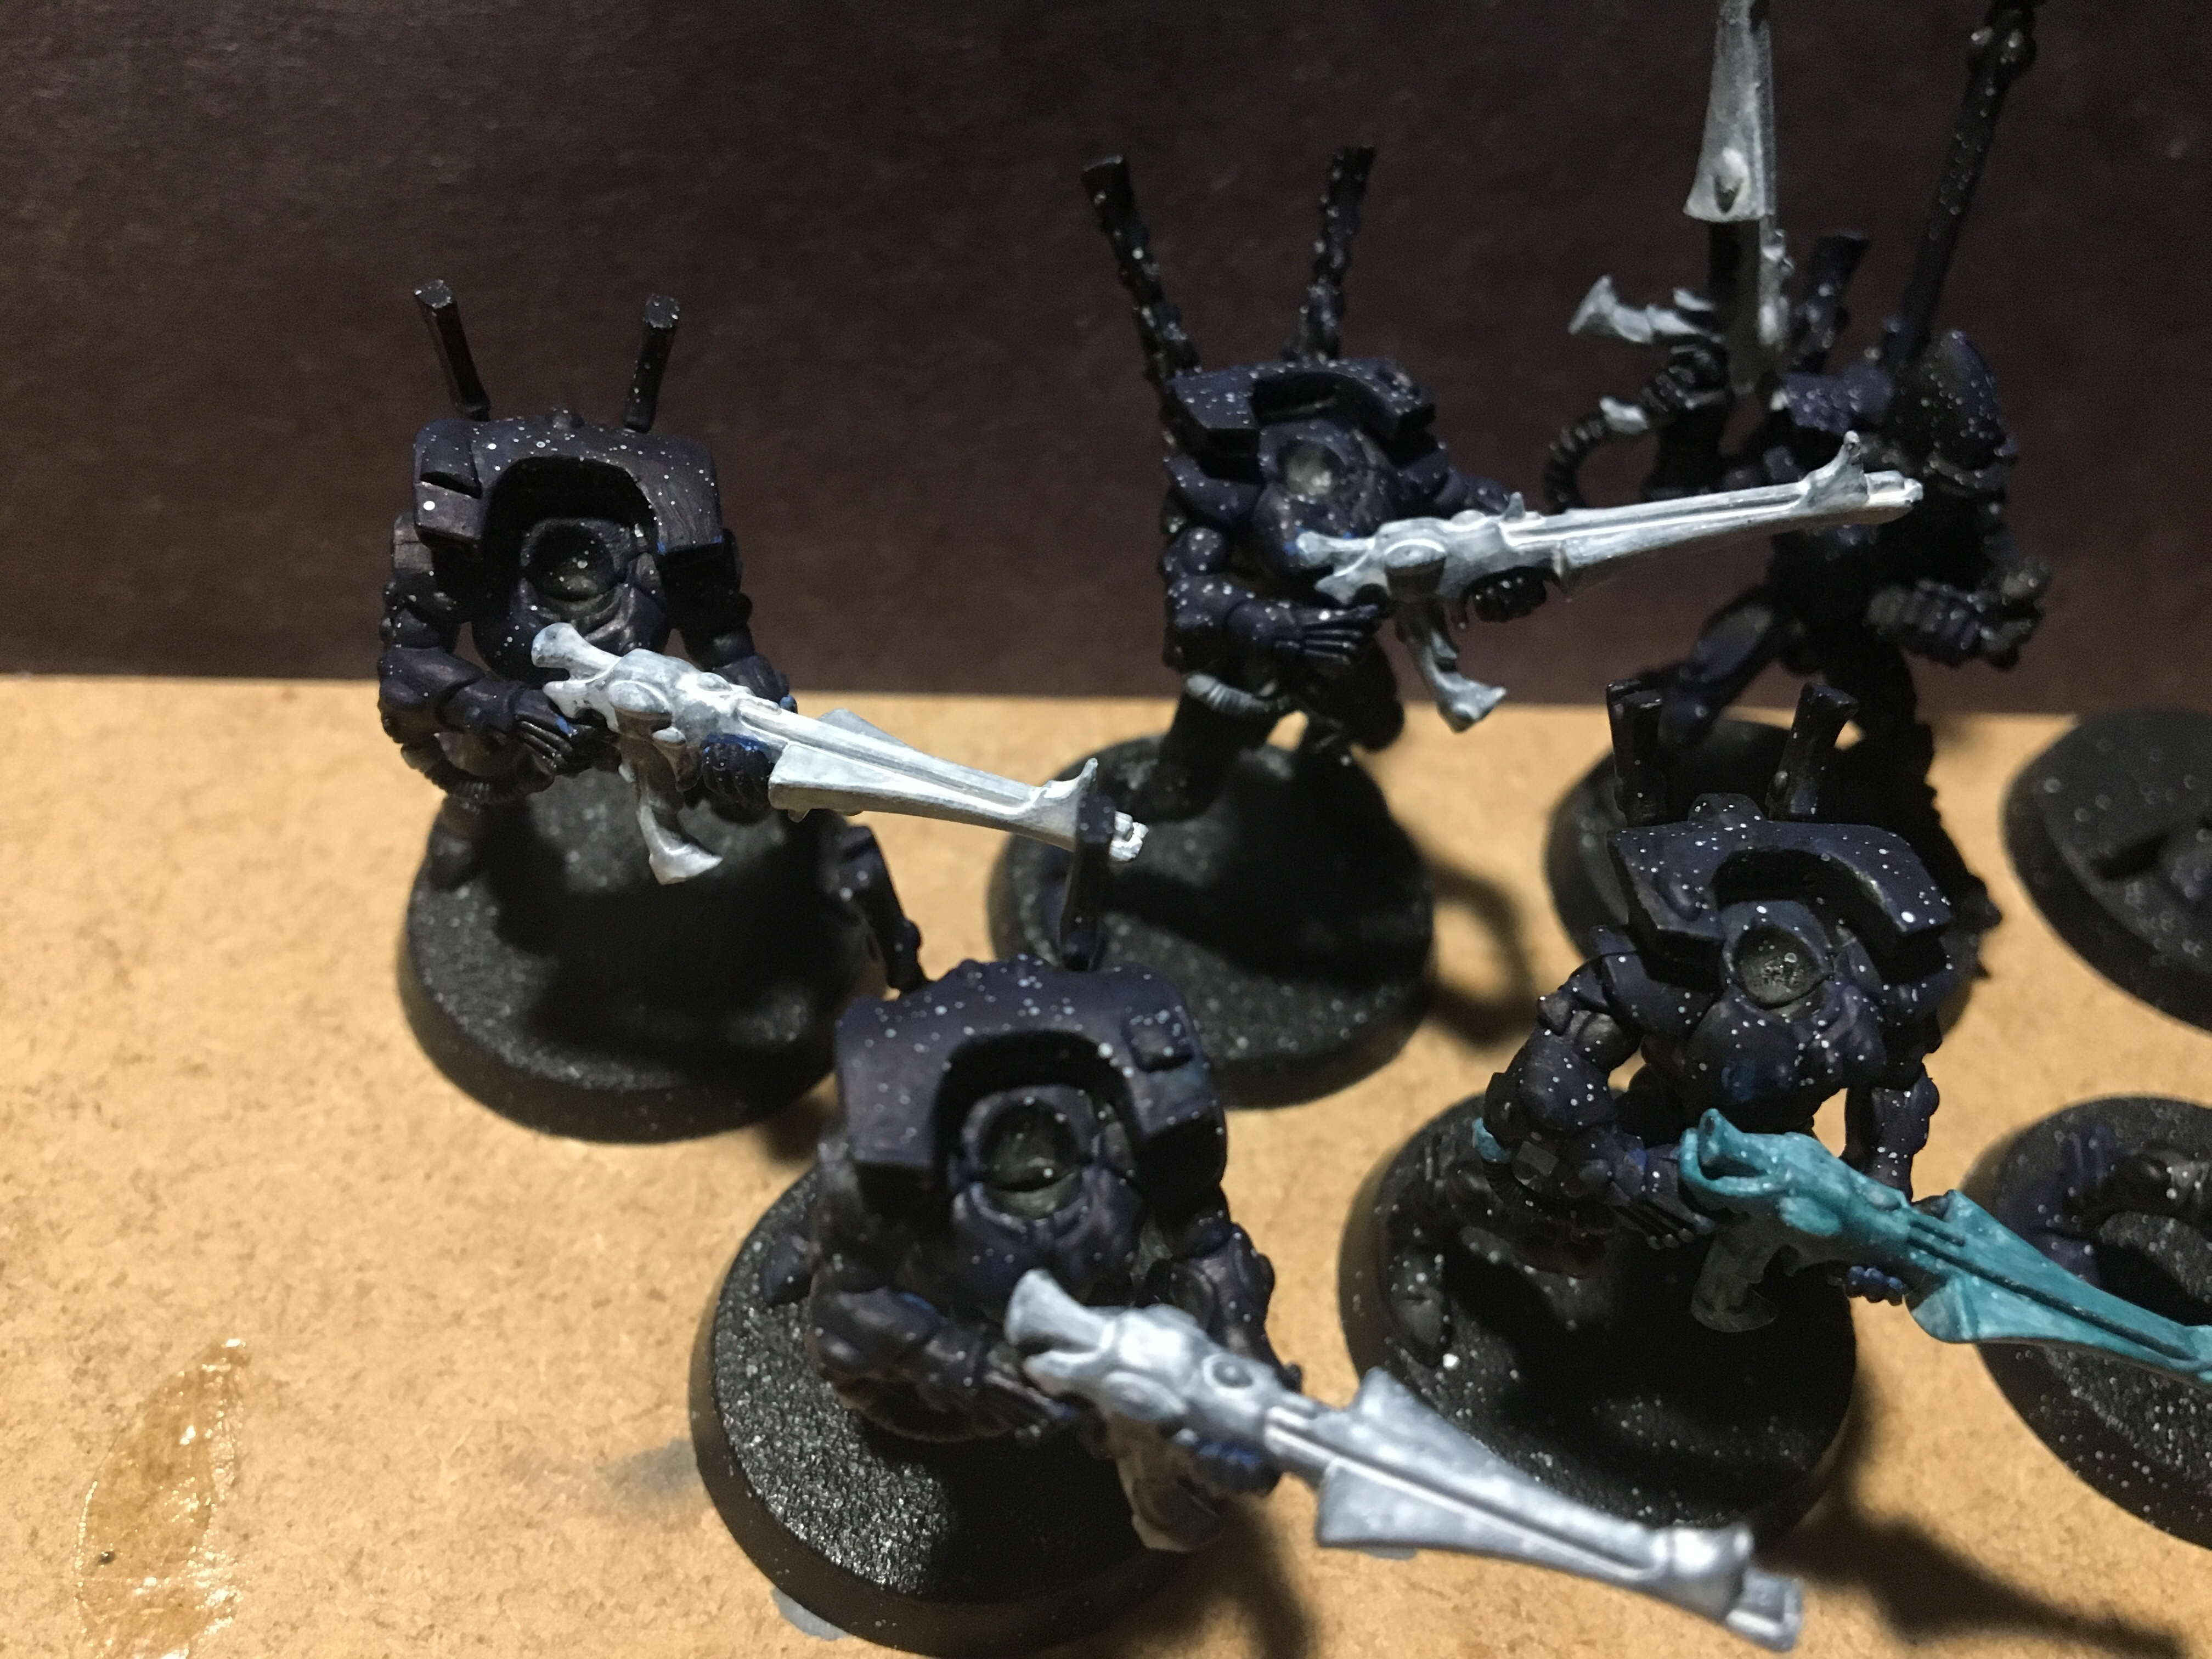
Tools needed: white, black and navy blue paint, flow aid, an old toothbrush, a palette, and some water. Plus somewhere to set up your models for splatter painting where you wont make a mess.

Flow aid can be subbed out for dish soap, allegedly, I haven’t tried that myself.

The plan: base coat the models with black primer and then some navy highlights on raised areas. Then mix up white paint with a drop if flow aid and a drop of water. Get that onto the bristles of your toothbrush. Flick the paint off the brush at your models. Voila, you’ve done it!

I chose to mount my models on a piece of wood and bring them out side for splatter time.

You can go as hard as you want with the splattering to get more or less stars. I went kinda light this time to be cautious.

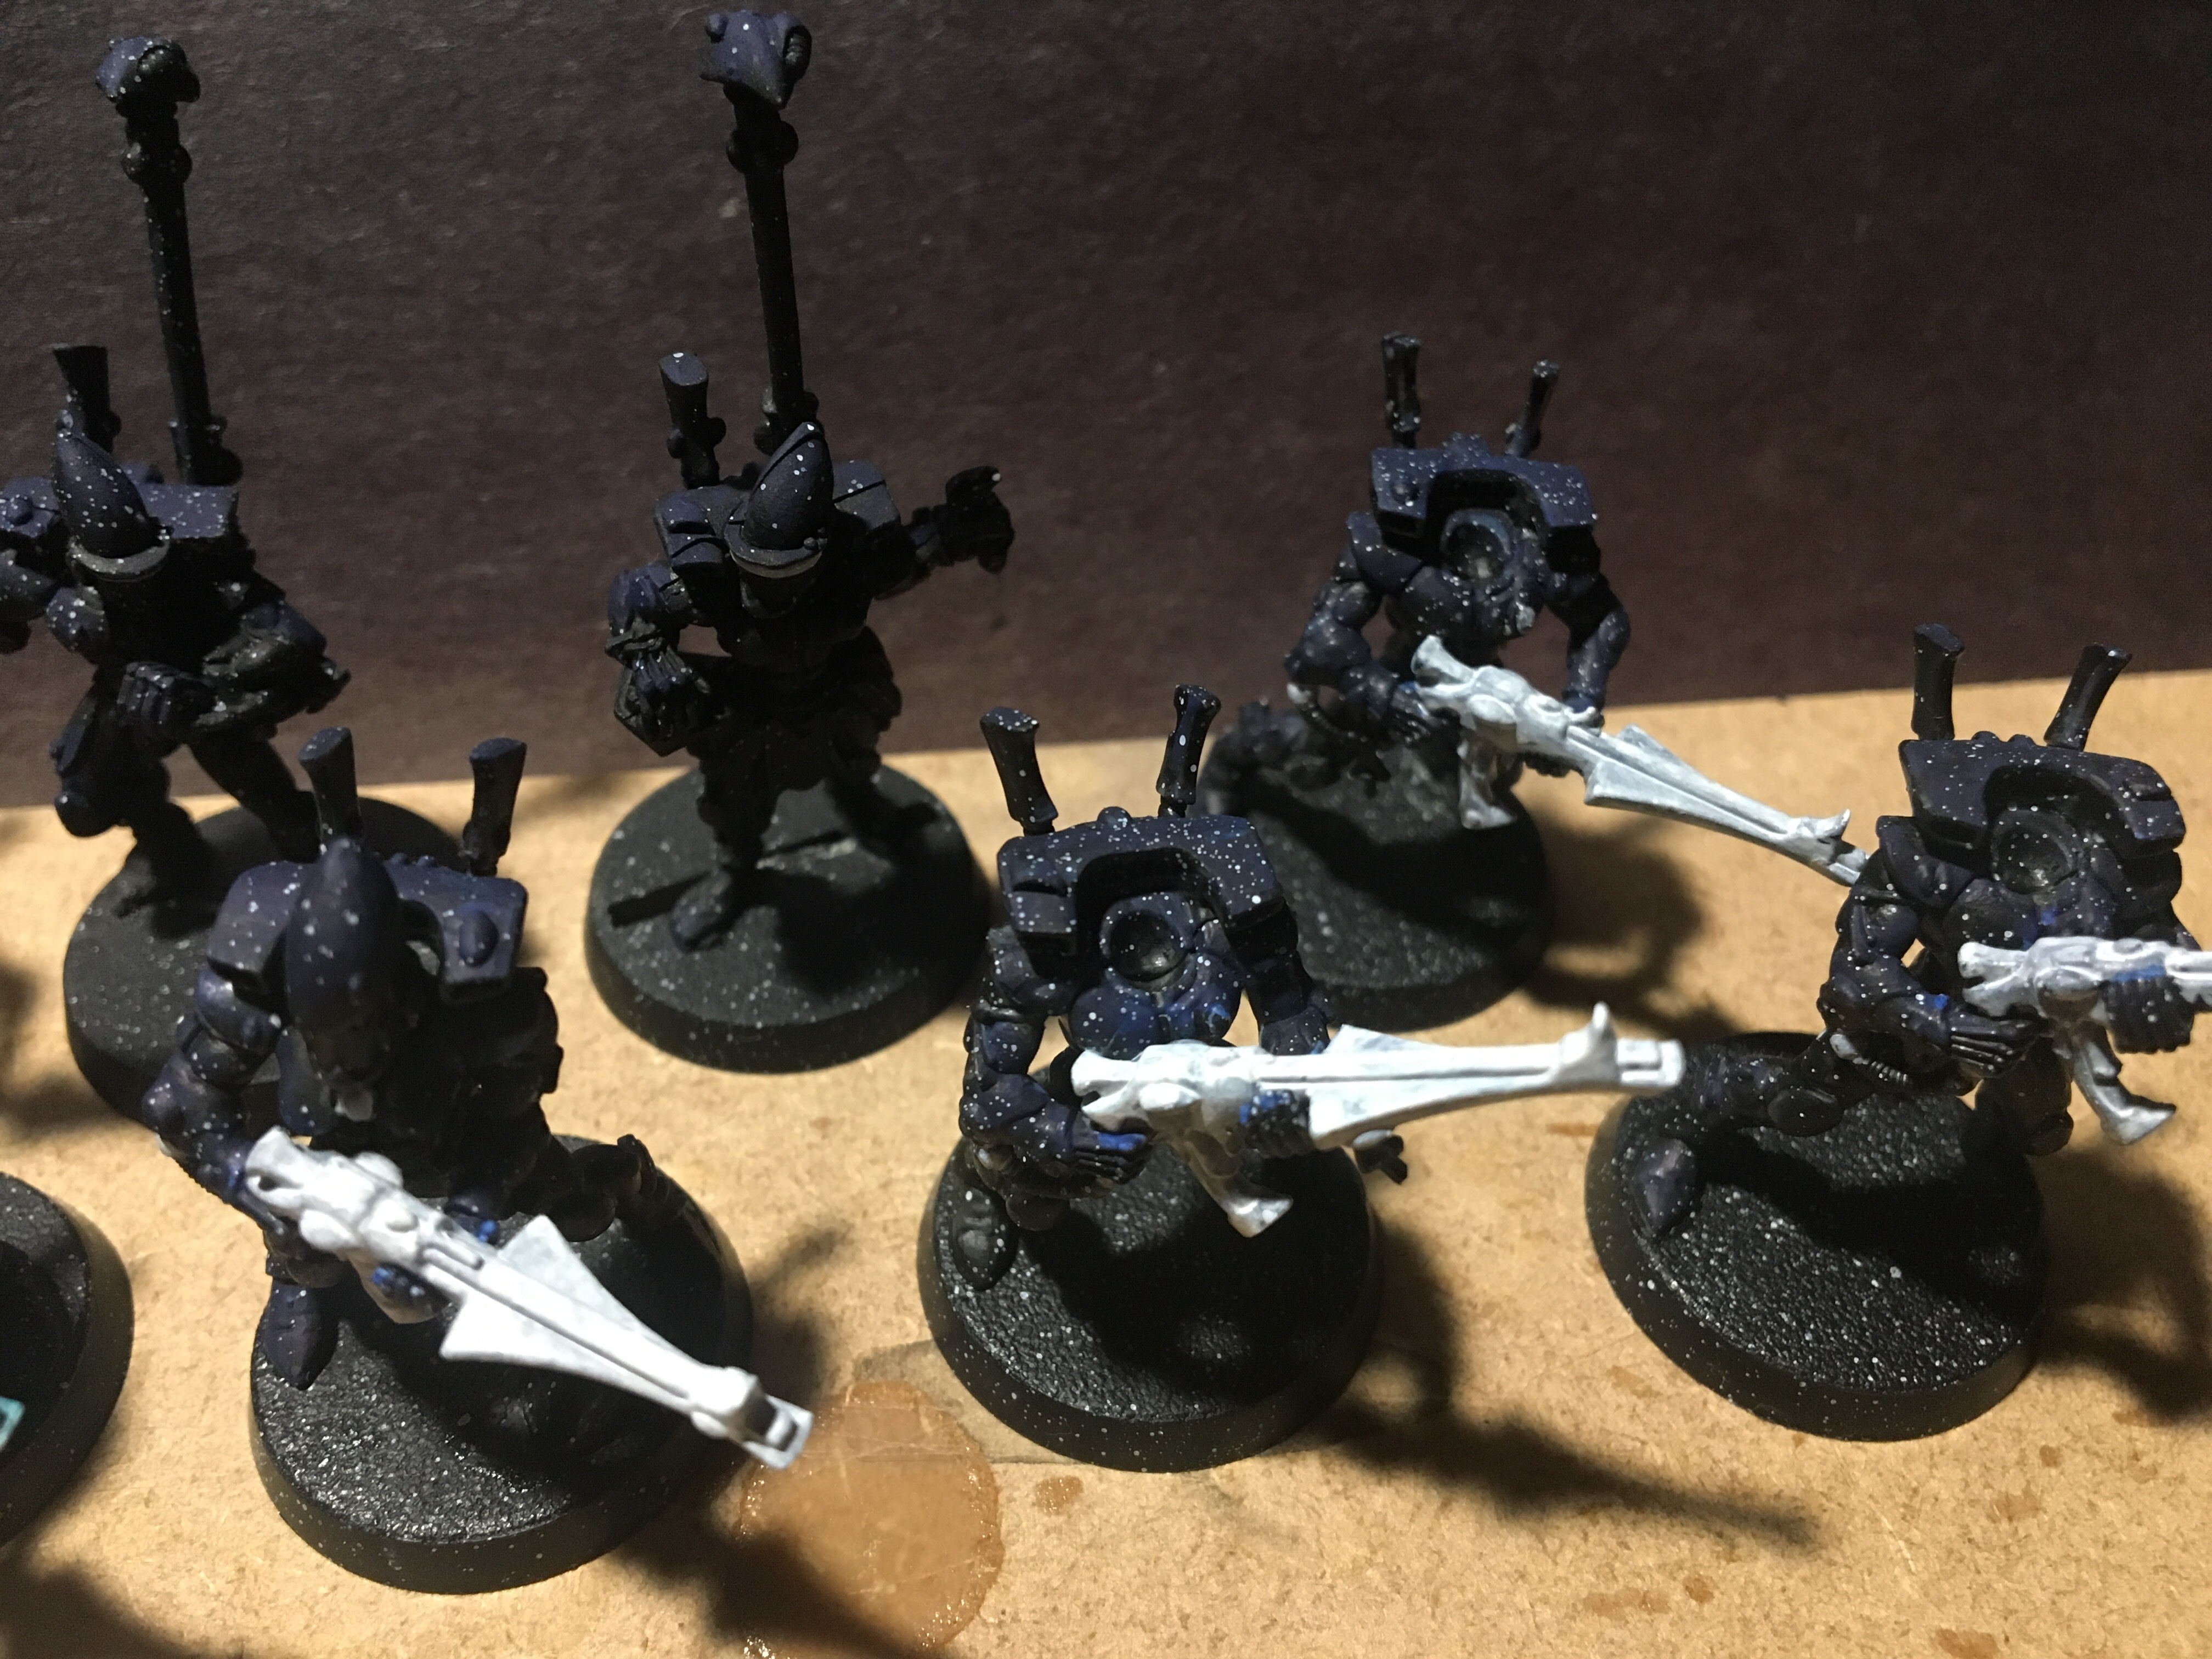
To take it another step further into experimental territory though, I added some drybrushing after the splatter paint onto one model as a test.

I tried a two tone drybrush scheme: dark blue on the left and purple on the right. The muted tones gave subtle results.

I want to try adding more drybrush layers of lighter colors in here to see if that gives me a more interesting look. And after that another round of splatter stars since the drybrushing covered up some of my original ones.

Bye, hope this inspires you.

#hobbystreak

Trying out diy black wash

Magician post wash.

This proved to be another case of learning how to use the wash. In some cases it did its job extremely well, that is, turning recesses black, but in others it merely tinted them grey.

A complication with this mini is that some of the recesses are very slight and so it takes finesse to get the wash targeted into only that recess. To compensate for this I think I will try putting a bunch of wash on and then painting over whatever gets onto the surrounding areas.

In some places where the wash worked I found the effect undesirable. On the yellow fabric folds in the back for instance, I think a brown wash would have gotten me a better look:

A little too over dramatic of a shadow methinks

Also in the works today:

#hobbystreak

Base Coats for Rangers and Primer on Xenos

Some mighty rangers. These guys feel like test models. Today I tinkered with them again, adding in more colors to cover more primer. Pardon the lighting, I hope to find a better solution in the future to show off the details. If you can tell, each mini has some variations on what color got used where for the sake of science and fun.

These Rangers are in what we call the “base paint” or “base coat” stage. They’ve been “underpainted” with primer already, and now I’ve begun to add the base colors that outline where the final project will end up.

Once I finish picking out my base paints I plan to move to the “layer” stage where I will add “highlights” and shadows to better simulate realistic outdoor lighting.

Speaking of underpainting, check out these 40k footsoldiers I primed today:

I used my trusty Vallejo brand black primer for these models. Brushed on by hand. With some finesse I mostly avoided getting primer on the see-thru green rod in the Necron warrior’s gauss rifle. I painted slowly to make sure I didn’t leave any bubbles in my primer coat. Hate when that happens, it leaves an undesirable texture on the model.

Hobby post 9/8/20 #hobbystreak #firstpost